If you adore Halloween treats or just love a fun twist on classic cupcakes, you’re going to be obsessed with this Vampire Bite Cupcakes Recipe. Imagine rich, dark chocolate cupcakes filled with a luscious, blood-red strawberry jam center, all topped with fluffy vanilla buttercream and eerie drips of jam that look like vampiric bites. It’s the perfect balance of spooky and scrumptious, and it’s surprisingly approachable for bakers of all experience levels. Whether you’re planning a themed party or just want to surprise loved ones with something delightfully chilling, this recipe brings the perfect blend of flavor and festive flair.
Ingredients You’ll Need

These ingredients are simple yet essential, weaving together the rich chocolatey foundation, creamy frosting, and the vibrant strawberry filling that gives this cupcake its signature bite. Each item plays a vital role in creating the perfect texture, flavor, and appearance.
- Chocolate chips: Melts smoothly for a deep, fudgy chocolate flavor in the cupcake base.
- Unsalted butter: Provides moisture and tenderness to the cupcakes and buttercream; dairy-free options work beautifully too.
- Milk: Keeps the batter smooth and helps blend flavors, with dairy-free alternatives easily substituting.
- Instant coffee: Enhances the chocolate notes without adding a coffee taste.
- Vanilla extract: Adds warmth and depth to the batter and frosting.
- Large egg: Binds the cupcake ingredients and adds richness.
- Coconut sugar or brown sugar: Gives natural sweetness with a hint of caramel complexity.
- Gluten-free all-purpose flour with xanthan gum: Ensures tender, fluffy cupcakes; Bob’s Red Mill 1:1 is recommended for ease.
- Unsweetened cocoa powder: Brings that intense chocolate kick and dark color.
- Baking soda and baking powder: Help the cupcakes rise perfectly.
- Salt: Balances and intensifies the sweetness and chocolate flavors.
- Fresh or frozen strawberries: Make the jam filling fresh and vibrantly fruity.
- Cornstarch: Thickens the strawberry jam to just the right consistency.
- Red gel food colouring: Creates that signature spooky blood-red hue.
- Icing sugar: Sweetens and lightens the buttercream frosting.
- Pinch of salt: Brings out the vanilla buttercream’s flavor layers.
How to Make Vampire Bite Cupcakes Recipe
Step 1: Prepare the Dark Chocolate Cupcakes
Start by preheating your oven to 350°F and lining a cupcake pan with paper liners. In a microwave-safe bowl, melt the chocolate chips with butter and milk in short intervals, stirring until smooth and warm. This is the foundation for an ultra-moist, chocolatey cupcake that’s anything but ordinary.
Step 2: Combine the Wet Ingredients
Once melted, whisk in the instant coffee for a subtle complexity, then add vanilla extract, the egg, and coconut sugar. Mixing these together well ensures a batter full of flavor and the right sweetness to complement the dark cocoa base.
Step 3: Incorporate the Dry Ingredients
Gently whisk together gluten-free flour, cocoa powder, baking soda, baking powder, and salt before folding them into the wet mixture. This careful step keeps the batter light and airy, ready to rise beautifully in the oven and deliver that perfect crumb texture.
Step 4: Bake the Cupcakes
Fill each cupcake liner just over halfway using an ice cream scoop to keep portions even. Bake for 15 to 19 minutes until a toothpick inserted in the center comes out clean. Allow them to cool in the pan for 5 minutes, then transfer to a wire rack and let cool completely—patience here leads to flawless decorating later!
Step 5: Make the Strawberry Jam Filling
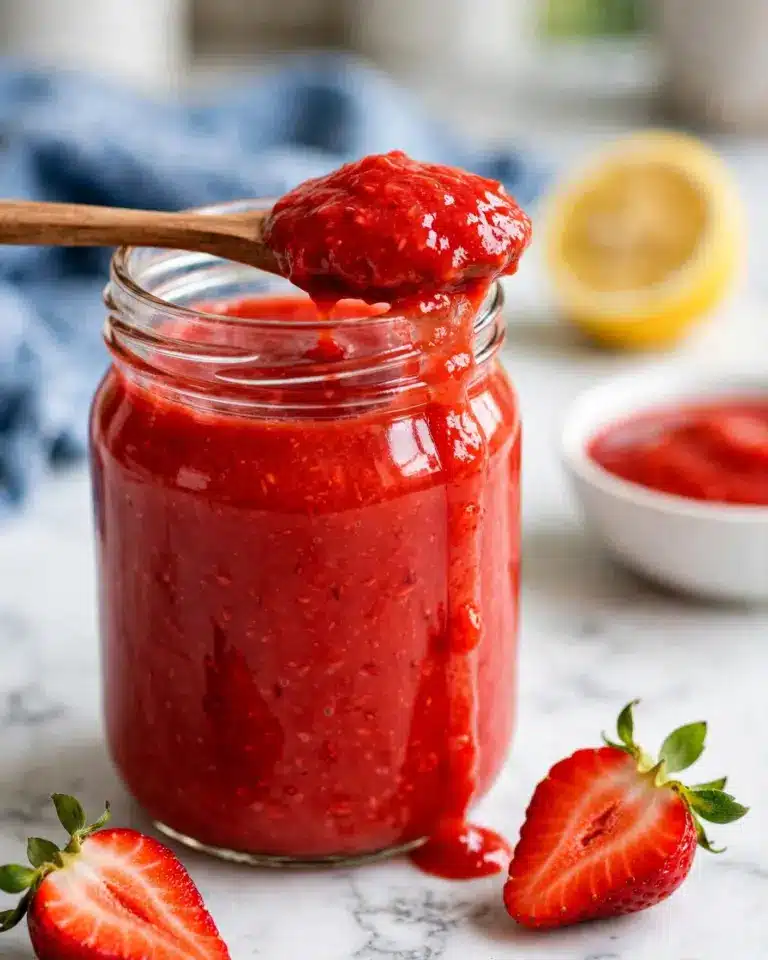
Add strawberries and a splash of water to a saucepan and cook until the fruit breaks down and thickens. Stir in cornstarch dissolved in water to achieve a jam-like consistency. A touch of red gel food coloring transforms it into the eerie blood-red filling that makes this recipe so special. Chill the jam before using it to fill the cupcakes.
Step 6: Whip Up the Vanilla Buttercream
Beat softened butter until creamy, then gradually add icing sugar to build a fluffy, smooth frosting. The vanilla and pinch of salt balance sweetness while milk adjusts texture, giving you a perfect consistency for piping atop the cupcakes like luscious clouds of creamy delight.
Step 7: Assemble the Vampire Bite Cupcakes
Use a piping tip to hollow out a cavity in each cupcake before spooning in the strawberry jam—this is the “blood” center that makes every bite exciting. Pipe the buttery frosting over the top, and use a straw to poke two holes to mimic vampire bites. Fill these tiny holes with the jam to recreate dripping blood. Now your cupcakes look as wicked as they taste!
How to Serve Vampire Bite Cupcakes Recipe

Garnishes
To elevate the spooky vibe, consider adding red sugar crystals or edible glitter around the frosting edges for a shimmering blood effect. Small plastic vampire fangs or themed toppers make these cupcakes irresistible at any Halloween party.
Side Dishes
Pair these cupcakes with a chilled glass of dark cherry juice or a deep red berry punch to echo the fruity notes of the jam. For a savory contrast, cheesy garlic bread or roasted pumpkin seeds work wonderfully, balancing sweet and savory flavors for a full festive experience.
Creative Ways to Present
Serve your Vampire Bite Cupcakes on a black or blood-red platter with gothic accents like fake spider webs or candlelight for drama. Using clear cupcake domes invites curiosity while keeping them fresh and adds a polished look to your spooky dessert table.
Make Ahead and Storage
Storing Leftovers
You can store leftover Vampire Bite Cupcakes in an airtight container at room temperature for up to 24 hours to keep the frosting soft and fresh. Beyond that, refrigeration is best to maintain the strawberry jam filling and buttercream integrity.
Freezing
These cupcakes freeze beautifully either before or after assembling. For the best results, freeze the baked cupcakes without jam or frosting, then thaw and fill as needed. Alternatively, freeze fully assembled cupcakes in an airtight container, wrapping them well to prevent freezer burn.
Reheating
Allow frozen cupcakes to thaw at room temperature for several hours before serving. Avoid microwaving fully frosted cupcakes to preserve texture; if needed, warm just the cupcake base slightly before adding frosting and filling.
FAQs
Can I make these cupcakes dairy-free?
Absolutely! This Vampire Bite Cupcakes Recipe is easily adapted by using dairy-free butter and plant-based milk, making it perfect for those avoiding dairy without sacrificing flavor or texture.
What if I don’t have gluten-free flour?
You can substitute regular all-purpose flour if you’re not avoiding gluten. Just be sure the flour matches one-to-one measurements to maintain cupcake structure and moisture.
How long does the strawberry jam filling keep?
The homemade jam can be stored in the refrigerator for up to one week in a sealed container, making it easy to prepare ahead and have ready for cupcake assembly.
Can I use frozen strawberries for the jam?
Yes, frozen strawberries work just fine—just be sure to thaw and drain any excess liquid before cooking to avoid overly watery jam.
What’s the best way to pipe the frosting on these cupcakes?
A large round or star piping tip works wonderfully to create a smooth swirl that covers the jam cavity perfectly. Make sure the buttercream is soft but not runny for the best hold.
Final Thoughts
I cannot recommend enough giving this Vampire Bite Cupcakes Recipe a try—whether for a holiday party or just to brighten up your baking routine with a touch of spooky fun. These cupcakes are not only a feast for your eyes but they reward your taste buds with every rich, creamy, and fruity bite. Get your ingredients ready, and enjoy making memories as delightful as these creepy treats!
Print
Vampire Bite Cupcakes Recipe
Vampire Bite Cupcakes are a spooky and delicious treat perfect for Halloween or any themed party. These moist dark chocolate cupcakes are filled with a rich, homemade strawberry jam that resembles blood, then topped with fluffy vanilla buttercream and decorated to look like vampire bite marks with dripping ‘blood’. Made with gluten-free flour and dairy-free options, they balance indulgence with thoughtful ingredient choices.
- Total Time: 3 hours 20 minutes
- Yield: 11 cupcakes
Ingredients
Dark Chocolate Cupcakes
- ¼ cup chocolate chips
- ½ cup unsalted butter (use dairy-free if preferred)
- ½ cup milk (use dairy-free if preferred)
- 1 tbsp instant coffee
- ½ tsp vanilla extract
- 1 large egg
- 1 cup coconut sugar (or brown sugar)
- 1 cup gluten-free all-purpose flour with xanthan gum (e.g., Bob’s Red Mill 1:1 baking flour, blue bag)
- ½ cup unsweetened cocoa powder
- ½ tsp baking soda
- ½ tsp baking powder
- ½ tsp salt
Strawberry Jam Filling
- 2 cups fresh or frozen strawberries
- 2 tsp cornstarch
- dash red gel food colouring
Vanilla Buttercream
- 1 cup unsalted butter, softened (use dairy-free if preferred)
- ½ tsp vanilla extract
- 2½ cups icing sugar
- 2 tsp milk (use dairy-free if preferred)
- pinch salt
Instructions
- Preheat Oven and Prepare Pan: Preheat the oven to 350°F (175°C) and line a cupcake pan with paper liners to ensure easy removal after baking.
- Melt Chocolate Mixture: In a large microwave-safe bowl, combine the chocolate chips, butter, and milk. Microwave in 20-second intervals, stirring between each until the chocolate chips are fully melted and the mixture is warm.
- Add Coffee and Wet Ingredients: Stir in the instant coffee until dissolved. Then whisk in vanilla extract, the egg, and coconut or brown sugar until well combined.
- Mix Dry Ingredients: In a separate bowl, whisk together the gluten-free flour, cocoa powder, baking soda, baking powder, and salt.
- Combine Mixtures: Gradually add the dry ingredients to the wet mixture, whisking gently at first, then vigorously to create a smooth, consistent batter.
- Fill Cupcake Liners and Bake: Use an ice cream scoop to fill each cupcake liner just over halfway. Bake at 350°F for 15-19 minutes or until a toothpick inserted into the center comes out clean.
- Cool Cupcakes: Cool cupcakes in the pan for 5 minutes, then transfer to a wire rack. Let cool completely for at least 2 hours before decorating.
- Make Strawberry Jam: Place strawberries in a heavy-bottom saucepan with just enough water to cover the bottom. Cook over medium-high heat, breaking down the berries with a spatula for 5-7 minutes. Reduce heat to medium-low and simmer for about 13 minutes, stirring often to prevent burning.
- Thicken Jam: Dissolve cornstarch in a few drops of water, then stir into the simmering jam. Cook on low for a few more minutes until thickened to a jam-like consistency.
- Add Color and Chill: Mix in red gel food coloring to achieve a deep blood-like color. Transfer jam to an airtight container and chill in the refrigerator for at least 2 hours.
- Prepare Buttercream: Using a stand mixer fitted with a paddle attachment, beat softened butter on medium-high speed for 1 minute. Scrape the bowl, then beat for another 2 minutes.
- Add Sugar Gradually: Incorporate icing sugar ½ cup at a time, starting on low speed and increasing to medium-high until fully mixed. Beat on medium-high for 3-5 minutes until the buttercream becomes fluffy.
- Flavor and Adjust Consistency: Beat in vanilla extract, salt, and milk. Add extra milk if a smoother texture is desired. Stir with a spatula to remove any excess air bubbles for easier piping.
- Core Cupcakes: Using a medium piping tip, carefully remove a small cavity from the center of each cooled cupcake to hold the jam filling.
- Fill with Jam: Place the chilled strawberry jam into a piping bag (or a ziplock bag with the corner cut) with a small tip, and fill the cavities inside each cupcake without overflowing.
- Pipe Buttercream: Fill a piping bag with a larger tip with the vanilla buttercream and swirl generously on top of each cupcake, fully covering the jam-filled cavity.
- Create Vampire Bite Marks: Use a straw to poke two small holes into the buttercream on each cupcake, then fill these holes with the jam using the small tip piping bag to simulate blood drips from vampire bites.
- Serve and Enjoy: Serve the cupcakes at room temperature within 24 hours for best flavor and texture.
Notes
- You can substitute dairy-free butter and milk to make these cupcakes vegan-friendly and dairy-free.
- Allow cupcakes to cool completely before filling and frosting to prevent the buttercream from melting.
- Leftover buttercream should be refrigerated and brought back to room temperature before use.
- Use gluten-free flour with xanthan gum to ensure proper texture and rise in cupcakes.
- Make strawberry jam at least 2 hours ahead to allow it to thicken and chill properly.
- Use gel food coloring sparingly as a little goes a long way for a vibrant red color.
- Best served within 24 hours at room temperature for optimal freshness and flavor.
- Prep Time: 30 minutes
- Cook Time: 50 minutes
- Category: Dessert
- Method: Baking
- Cuisine: American
- Diet: Gluten Free