If you’ve been searching for a delightful, fresh, and elegant dessert that’s surprisingly easy to make, you’re going to adore this Mini Fruit Tarts with Vanilla Pudding and Fresh Fruit Recipe. Imagine crisp, buttery tart shells cradling smooth, homemade vanilla pudding, crowned with vibrant, juicy morsels of fresh fruit. Each bite is a perfect balance of creamy, fruity, and flaky textures that feel as special as any pâtisserie treat, yet are wonderfully achievable in your own kitchen. This recipe shines at parties, family dinners, or anytime you want to make someone smile with a burst of color and flavor.
Ingredients You’ll Need
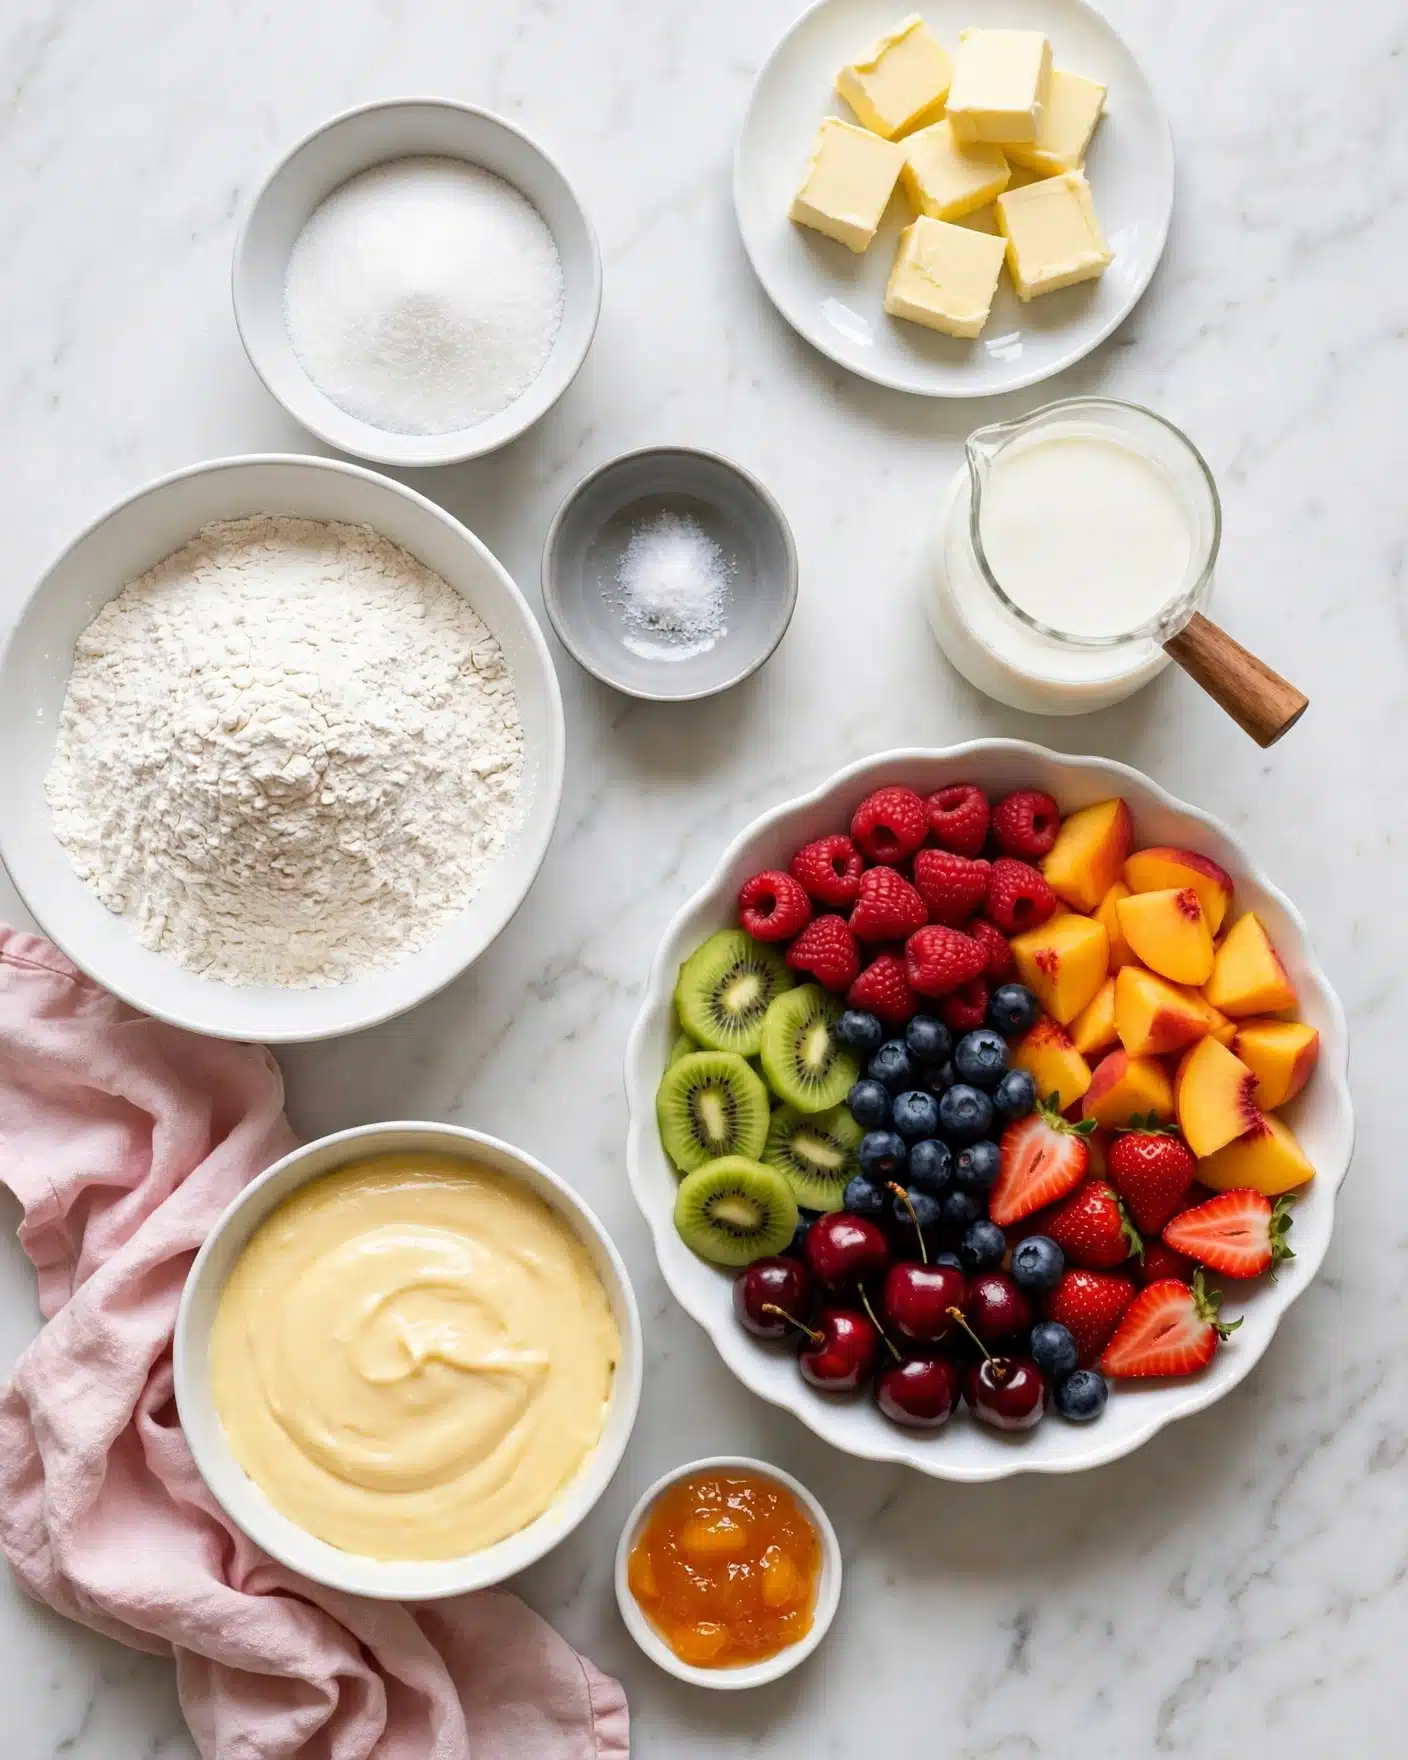
These ingredients are refreshingly simple, yet each one plays a crucial role in bringing your Mini Fruit Tarts with Vanilla Pudding and Fresh Fruit Recipe to life. From the flaky crust to the luscious filling and the bright fruit topping, everything harmonizes beautifully.
- All-purpose flour (1 ½ cups): The base of our tender and crisp tart shells that hold everything together.
- Granulated sugar (4 tablespoons): Adds a touch of sweetness to the dough, enhancing the overall flavor.
- Fine sea salt (½ teaspoon): Balances the sweetness and boosts the buttery flavor.
- Unsalted butter (12 tablespoons, cold, cut into pieces): The secret to creating that irresistibly flaky and buttery crust.
- Milk (3 tablespoons): Moistens the dough just enough to bring it together without losing flakiness.
- Homemade vanilla pudding (generous ½ cup): A creamy, rich filling that complements the tart shell perfectly.
- Assorted fresh fruit (2 cups, diced): Think berries, kiwi, grapes, cherries, peaches – the fresh element that brightens each bite and adds vibrant color.
- Apricot preserves (2 tablespoons, optional): Provides a glossy, mildly sweet glaze that makes your tarts look as delightful as they taste.
How to Make Mini Fruit Tarts with Vanilla Pudding and Fresh Fruit Recipe
Step 1: Prepare the Tart Dough
Begin by combining the all-purpose flour, granulated sugar, fine sea salt, and cold unsalted butter pieces in a food processor. Pulse until the mixture resembles coarse meal, which means the butter is evenly cut into the flour creating that flaky texture we’re after.
Step 2: Bring the Dough Together
Pour in half of the milk and pulse a few times. Add more milk little by little if the dough isn’t coming together, but be careful not to add too much. Your dough should be pliable, hold together in a ball, yet not feel wet or sticky.
Step 3: Shape the Mini Tart Shells
Using a small cookie scoop (about 1 tablespoon), portion the dough evenly into each well of a 24-well mini muffin tin. Press the dough along the bottom and up the sides to form little crusts. Pop the tray into the refrigerator to chill for at least 30 minutes – this resting step is key to keeping the crusts crisp during baking.
Step 4: Bake the Tart Shells
Preheat your oven to 350°F while the tart dough chills. Before baking, prick the bottoms of each shell a few times with a fork to prevent puffing. Bake for 13 to 16 minutes or until the edges turn a lovely golden brown. Transfer the tin to a cooling rack and let the tart shells cool completely before removing them.
Step 5: Assemble the Mini Fruit Tarts with Vanilla Pudding and Fresh Fruit Recipe
Gently lift each cooled tart shell from the tin with a small offset spatula. Spoon a generous teaspoon of the homemade vanilla pudding into each shell, creating a smooth creamy layer. Top with your diced fresh fruit, mixing colors and textures for the most appealing look.
Step 6: Add the Optional Glaze
If you want that beautifully shiny finish, mix the apricot preserves with a teaspoon of water in a microwave-safe bowl. Heat for 15 to 30 seconds until melted and smooth, then lightly brush the glaze over the fruit-topped tarts to seal in freshness and add that extra hint of sweetness.
How to Serve Mini Fruit Tarts with Vanilla Pudding and Fresh Fruit Recipe

Garnishes
To elevate your Mini Fruit Tarts with Vanilla Pudding and Fresh Fruit Recipe even further, consider sprinkling some finely chopped fresh mint leaves or a dusting of powdered sugar right before serving. The mint adds a refreshing herbal aroma while the powdered sugar gives that delicate snowy finish, perfect for impressing guests.
Side Dishes
These mini tarts pair well with a light cup of tea or a glass of dessert wine like Moscato or Riesling. They also complement brunch spreads or casual get-togethers with a cheese platter and crisp crackers. Their sweet and fruity nature balances out savory sides beautifully.
Creative Ways to Present
Why not turn your Mini Fruit Tarts with Vanilla Pudding and Fresh Fruit Recipe into a showstopper centerpiece? Arrange the tarts on a tiered dessert stand or a large platter garnished with flower petals or edible gold leaf for an elegant touch. You can also experiment with layering different fruits or piped vanilla pudding for added flair.
Make Ahead and Storage
Storing Leftovers
Mini fruit tarts are best enjoyed fresh, but if you have leftovers, keep them stored in an airtight container in the refrigerator for up to two days. The crust may lose some crispness, but the pudding and fruit will stay fresh and delicious.
Freezing
It’s not recommended to freeze the assembled tarts because the fruit and pudding don’t thaw well and can become watery. However, you can freeze the baked tart shells separately in a sealed container for up to a month and then fill them fresh when ready to serve.
Reheating
If you want to refresh crispness, you can warm the frozen tart shells at 325°F for about 5 minutes before adding pudding and fruit. Reheated assembled tarts aren’t ideal since the pudding may soften or melt.
FAQs
Can I use store-bought vanilla pudding?
Absolutely! While homemade vanilla pudding gives a richer flavor and silkier texture, good-quality store-bought pudding works well too—especially if you’re short on time.
What types of fruit are best for these tarts?
Choose a variety of colorful, fresh fruits like berries, kiwi, grapes, cherries, peaches, or any seasonal favorites. The mix of colors and textures makes each tart look as good as it tastes.
Can I make mini fruit tarts gluten-free?
Yes! Substitute the all-purpose flour with a gluten-free flour blend that can be used for baking. Ensure the blend contains xanthan gum for the best texture.
How long does it take to make these tarts?
The total preparation and baking time is about 2 hours and 25 minutes, including chilling and cooling. Most of this time is hands-off, so it’s a great make-ahead dessert.
Do I have to use apricot preserves for the glaze?
Not at all. The glaze is optional but recommended for a glossy finish and slight added sweetness. If you prefer, you can skip it and still have delicious tarts.
Final Thoughts
There’s something truly special about making and sharing these Mini Fruit Tarts with Vanilla Pudding and Fresh Fruit Recipe. They bring together simplicity and elegance with every bite — crisp shells, creamy pudding, and fresh fruit that practically sing in your mouth. Whether for a celebration or a leisurely afternoon treat, these tarts will quickly become a cherished favorite. So go ahead, treat yourself and your loved ones to this cheerful, colorful dessert masterpiece. You’ll be so glad you did!
Print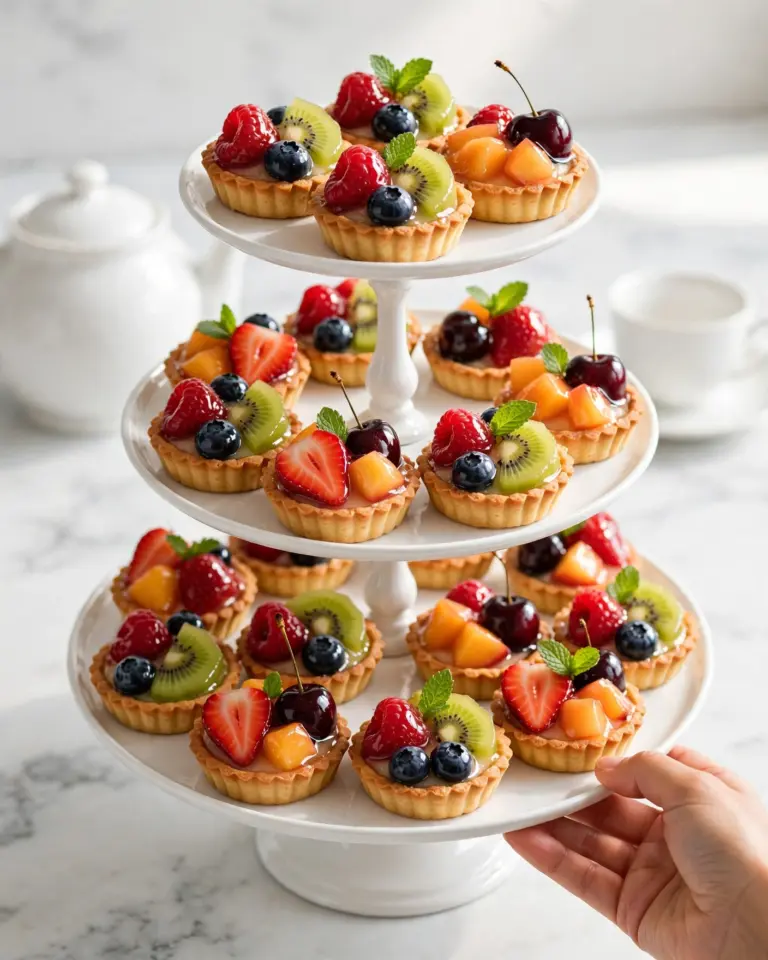
Mini Fruit Tarts with Vanilla Pudding and Fresh Fruit Recipe
These Mini Fruit Tarts are delicate, bite-sized desserts featuring a crisp pastry shell filled with creamy homemade vanilla pudding and topped with a colorful assortment of fresh fruit. Perfect for parties or elegant gatherings, they combine a buttery crust with fresh flavors and an optional apricot glaze for a shiny finish.
- Total Time: 2 hours 25 minutes
- Yield: 24 mini fruit tarts
Ingredients
For the Tart Shells
- 1 ½ cups all-purpose flour
- 4 tablespoons granulated sugar
- ½ teaspoon fine sea salt
- 12 tablespoons unsalted butter (cold, cut into pieces)
- 3 tablespoons milk
For the Filling and Topping
- Generous ½ cup homemade vanilla pudding
- 2 cups diced assorted fresh fruit (such as berries, kiwi, grapes, cherries, peaches)
- 2 tablespoons apricot preserves (optional)
Instructions
- Prepare the Dough: In the bowl of a food processor, combine the flour, sugar, salt, and cold butter pieces. Pulse several times until the mixture resembles coarse meal.
- Form the Dough: Pour in half of the milk and pulse until the dough begins to come together into a ball. Add additional milk a splash at a time if needed, until the dough holds together but is not wet or sticky.
- Shape Tart Shells: Using a small cookie scoop, portion 1-tablespoon portions of dough into each well of a 24-well mini muffin tin. Press the dough evenly across the bottoms and up the sides of each well. Refrigerate for at least 30 minutes to chill.
- Preheat Oven: While the tart shells chill, preheat the oven to 350°F (175°C).
- Bake Tart Shells: Once chilled, prick the bottom of each tart shell several times with a fork to prevent puffing. Bake for 13-16 minutes or until the edges turn golden brown. Remove and cool completely on a wire rack.
- Assemble Tarts: Gently remove the cooled tart shells from the pan using a small offset spatula. Fill each shell with about a teaspoon of homemade vanilla pudding, then top with a mixture of diced fresh fruit.
- Optional Glaze: To add a glossy finish, mix the apricot preserves with 1 teaspoon of water in a microwave-safe bowl. Heat for 15-30 seconds until melted, then gently brush the glaze over the fruit-topped tarts.
- Serve or Store: Serve the mini fruit tarts immediately or refrigerate until ready to serve, ensuring they stay fresh and cool.
Notes
- Use a variety of colorful fruits such as strawberries, blueberries, kiwi, grapes, cherries, and peaches for the best visual appeal and flavor combination.
- If homemade vanilla pudding is not available, high-quality store-bought pudding can be used as a substitute.
- The apricot glaze is optional but adds a beautiful shine and slight sweetness to the tart tops.
- Ensure the butter is very cold when mixing to achieve a tender and flaky tart shell crust.
- Store the assembled tarts in the refrigerator and consume within 2 days for the best freshness.
- Prep Time: 35 minutes
- Cook Time: 15 minutes
- Category: Dessert
- Method: Baking
- Cuisine: American
- Diet: Vegetarian