If you have a sweet tooth and love that perfect balance of crisp, buttery layers paired with luscious cream, then you are going to adore this Homemade Cream Horns with Flaky Puff Pastry and Whipped Cream Filling Recipe. It’s a delightful little pastry that looks dazzling and tastes like it belongs in a fancy bakery, but the best part is you can make it right in your own kitchen! Using simple puff pastry and homemade whipped cream, these cream horns are a charming treat that’s easy to assemble and absolutely irresistible.
Ingredients You’ll Need
These ingredients are incredibly straightforward but play essential roles in creating that flaky texture and creamy sweetness which makes these cream horns so special. Each one adds its magic, whether it’s the crisp puff pastry layers or the airy whipped cream filling.
- 1 sheet frozen puff pastry, thawed: The star of the show, this provides all the flaky, golden crunch.
- 1 egg, room temperature: Used to create a gorgeous golden sheen with the egg wash.
- 1 cup heavy cream: Whipped to perfection for that light and luscious filling.
- 1 cup powdered sugar, divided: Half for dusting the pastries, half to sweeten the whipped cream filling.
- 1 teaspoon pure vanilla extract: Adds warmth and depth to the cream’s flavor.
- Non-stick spray or butter for greasing cones: Ensures easy removal of the baked pastries.
How to Make Homemade Cream Horns with Flaky Puff Pastry and Whipped Cream Filling Recipe
Step 1: Prepare Your Pastry Cones
First, take out your thawed puff pastry sheet and slice it crosswise into nine even strips. These strips will be wrapped around pastry cones to form those classic horn shapes. If you don’t have metal cones, you can easily fashion your own with aluminum foil—a quick and clever trick that works wonderfully. Don’t forget to spray your cones well with non-stick spray to make sure the pastry releases cleanly after baking.
Step 2: Wrap the Puff Pastry
Starting at the pointed end of each cone, wind a puff pastry strip around, overlapping slightly to prevent gaps so the pastry stays intact as it bakes. Secure the end by gently pressing it into the layer below. To help the pastry maintain its shape, place the wrapped cones in the freezer for 20 to 30 minutes. This chill time is a crucial step for those perfect, flaky horns.
Step 3: Bake to Golden Perfection
Preheat your oven to 400°F. Lay your cones seam side down on baking sheets lined with parchment paper or silicone mats, spacing them 2-3 inches apart so they have room to puff up without sticking together. Brush each horn generously with a glossy egg wash made from an egg whisked with a teaspoon of water. Then, dust lightly with powdered sugar for an extra touch of sweetness. Bake for 15 minutes or until golden brown and irresistible. Let them cool completely with the cones still inside to keep their hollow shape crisp and perfect.
Step 4: Whip Up the Cream Filling
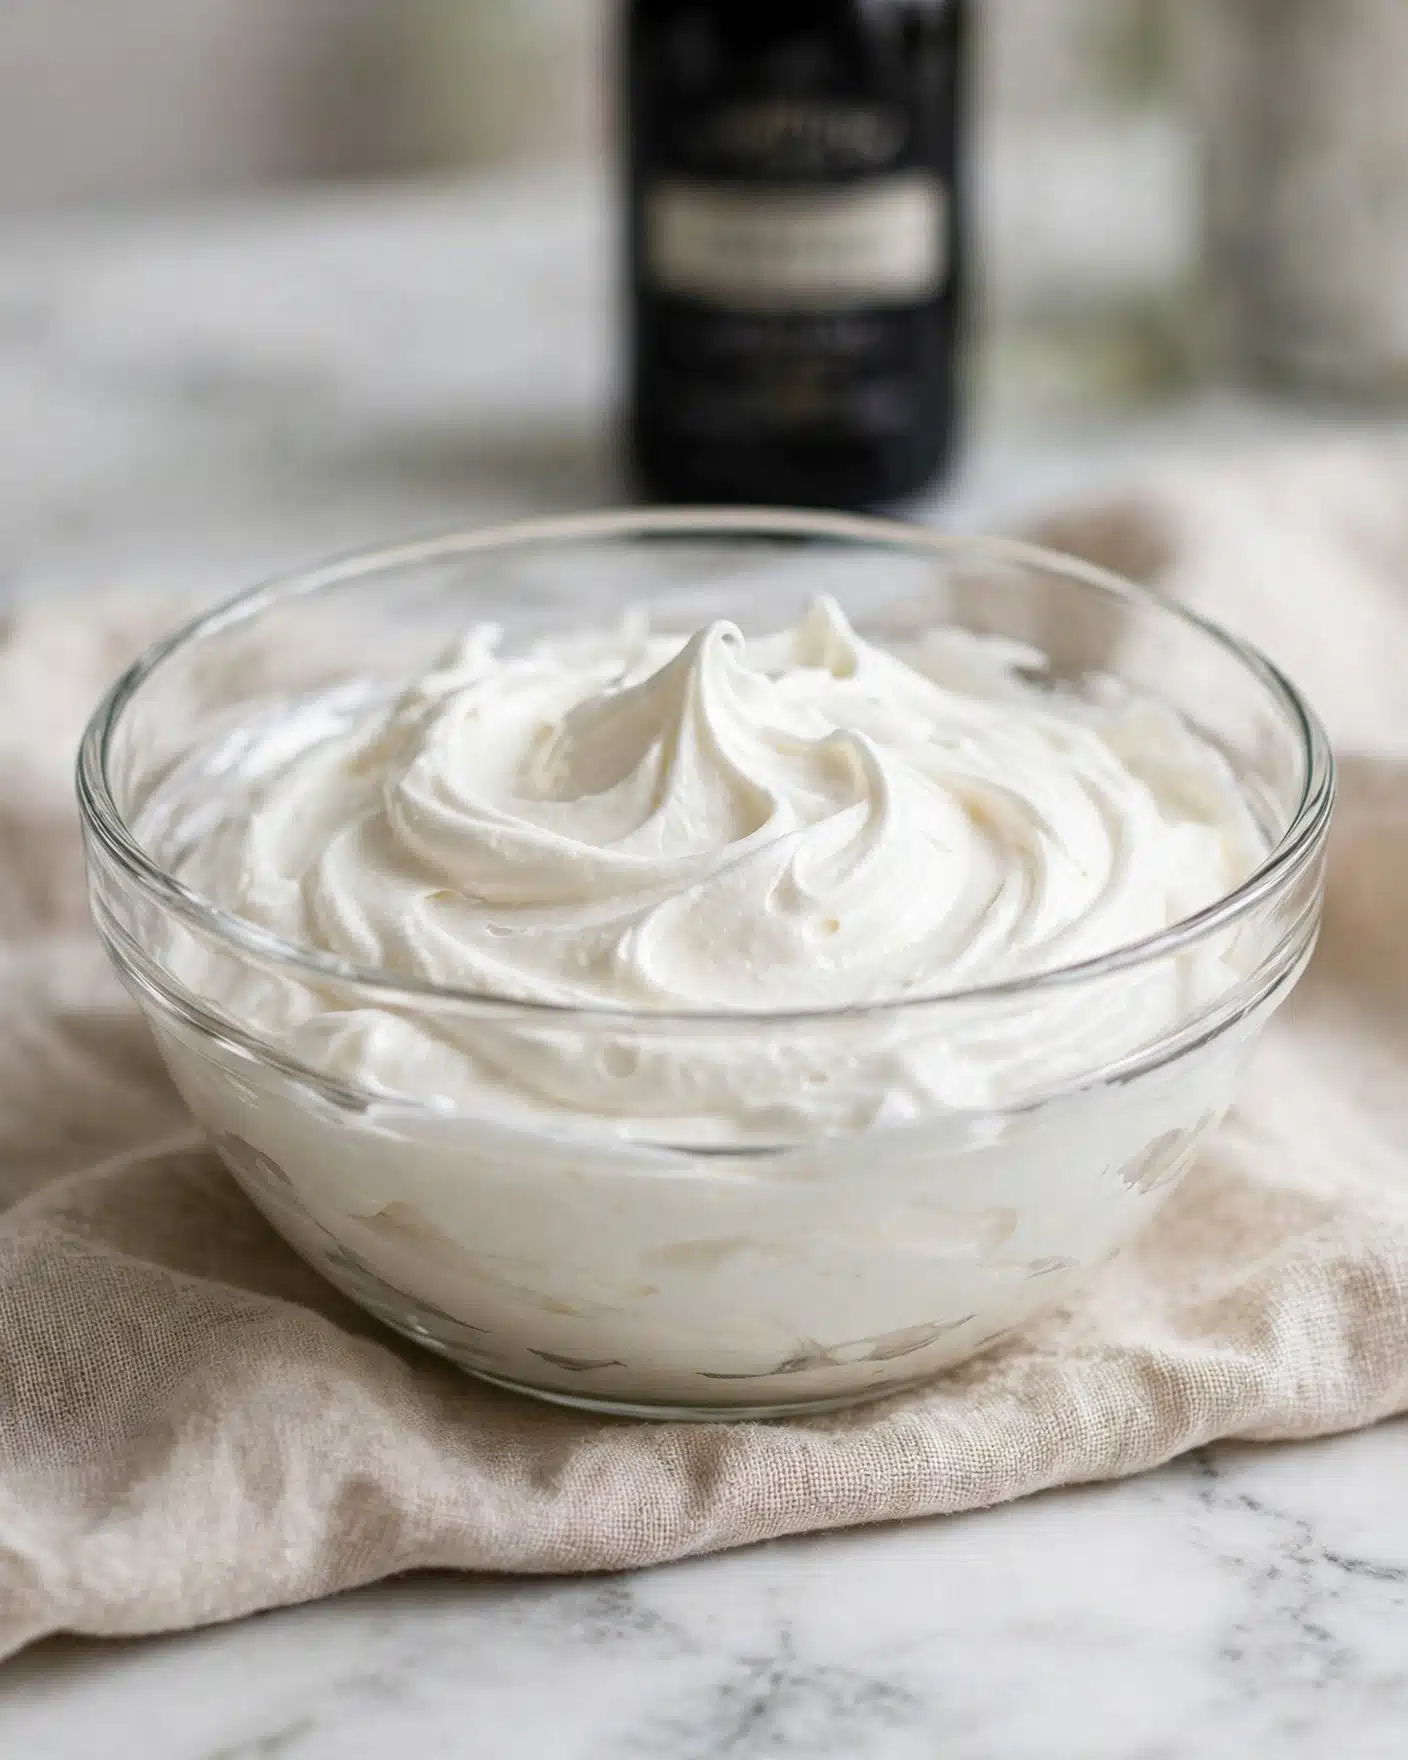
While your horns cool, whip the heavy cream in a large bowl until it starts to form soft peaks. Add the vanilla extract and the remaining powdered sugar, then continue whipping until stiff peaks develop. This whipped cream makes the filling luxuriously light, sweet, and smooth—exactly what you want inside those crisp pastry shells.
Step 5: Fill and Finish Your Cream Horns
Once the pastry horns are fully cooled, fit a piping bag with a nozzle and fill each hollow shell generously with your silky whipped cream. For an optional flourish, sprinkle some extra powdered sugar on top or drizzle your favorite chocolate sauce for that extra wow factor. Pop them into the fridge if you’re not serving immediately and enjoy the magic of homemade pastry at its finest!
How to Serve Homemade Cream Horns with Flaky Puff Pastry and Whipped Cream Filling Recipe

Garnishes
Adding a dusting of powdered sugar is simple and classy, but you can also try dusting with cocoa powder or adding a few fresh berries for a pop of color and flavor. Sometimes a light drizzle of melted chocolate or caramel sauce can elevate these treat’s appearance and taste, making them party-perfect.
Side Dishes
These cream horns are delightful on their own but pair wonderfully with a cup of freshly brewed coffee, a pot of tea, or a chilled glass of sparkling wine. For brunch, serve alongside fresh fruit salad or a bowl of mixed berries to add freshness and balance to the decadent creaminess.
Creative Ways to Present
Serve your cream horns nestled in shredded edible paper or crinkled parchment on a pretty platter. Stack them in a tiered arrangement for special gatherings or arrange them alongside colorful macaroons or mini éclairs to create a stunning dessert spread that will wow your guests. Personalize each with a small edible flower or a dusting of edible glitter for celebrations.
Make Ahead and Storage
Storing Leftovers
If you happen to have leftovers, store your cream horns in an airtight container in the refrigerator. It’s best to keep them chilled since the whipped cream filling can soften the pastry over time. Enjoy within 1 to 2 days for optimal flakiness and freshness.
Freezing
You can freeze baked cream horns without the filling. After baking and cooling, remove them from the cones and freeze in a single layer on a baking sheet before transferring to airtight bags or containers. Freeze for up to 1 month. Once ready to serve, thaw completely and fill with fresh whipped cream.
Reheating
Reheat unfilled cream horns in a preheated oven at 350°F for 3-5 minutes to refresh the crispiness. Avoid reheating filled horns as the whipped cream will melt. Instead, add the filling just before serving for that light, fluffy texture everyone loves.
FAQs
What can I use if I don’t have metal pastry cones?
Don’t worry! You can make your own cones by rolling strips of aluminum foil into cone shapes. Just be sure to spray them well with non-stick spray so the pastry comes off easily after baking.
Can I use homemade puff pastry instead of frozen?
Absolutely! Homemade puff pastry will add an extra level of buttery flavor, though it does take more time and skill. Frozen puff pastry is a fantastic shortcut for ease and consistent flaky results.
How long can I keep the filled cream horns?
Once filled, keep cream horns refrigerated and enjoy within a day or two. The whipped cream can cause the pastry to soften if stored too long, so fresh is always best!
Can I make the whipped cream filling ahead of time?
Yes, you can whip the cream up to a day ahead. Store it tightly covered in the fridge and give it a quick re-whip before piping to maintain those stiff peaks.
Is there a way to make these cream horns vegan or dairy-free?
For a dairy-free twist, replace the heavy cream with coconut cream whipped with a sweetener of your choice. Use vegan puff pastry available in some stores or make your own vegan version. The flavor and texture will still be delightful.
Final Thoughts
There is something truly joyful about making your own bakery-quality treats at home, and this Homemade Cream Horns with Flaky Puff Pastry and Whipped Cream Filling Recipe is proof. It’s a simple yet elegant dessert that brings smiles and happy sighs at every bite. So grab your puff pastry sheets and get ready to impress yourself and your loved ones with these golden, creamy delights!
Print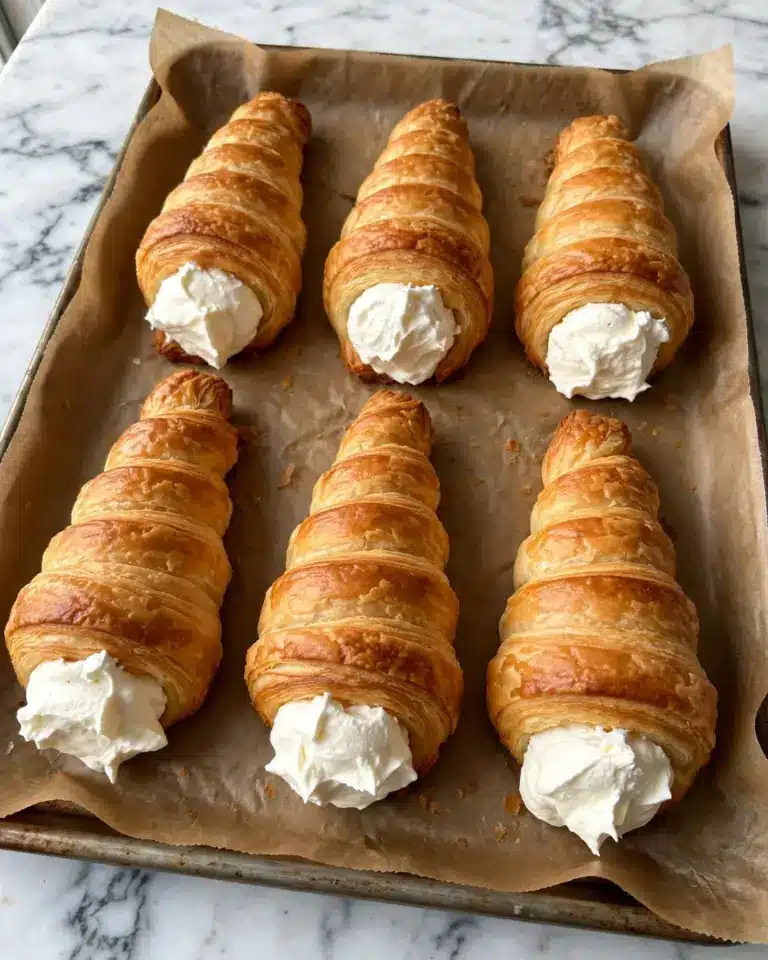
Homemade Cream Horns with Flaky Puff Pastry and Whipped Cream Filling Recipe
This homemade cream horns recipe features delicate, flaky puff pastry cones filled with sweet, fluffy whipped cream. Using frozen puff pastry makes this classic bakery treat quick and easy to prepare at home. These golden, crisp pastries filled with vanilla-scented whipped cream are perfect for a special dessert or elegant party treat.
- Total Time: 1 hour
- Yield: 9 cream horns
Ingredients
Pastry Horns
- 1 sheet frozen puff pastry, thawed
- 1 egg, room temperature
- 1 teaspoon water
- 1 cup (120 g) confectioners’ sugar (powdered sugar), divided
Cream Filling
- 1 cup (238 g) heavy cream
- 1 teaspoon pure vanilla extract
- 3/4 cup (90 g) confectioners’ sugar (powdered sugar)
Instructions
- Thaw and Cut Pastry: Allow the frozen puff pastry sheet to thaw enough to unfold without tearing. Cut the sheet crosswise into nine equal strips and set aside.
- Prepare Pastry Cones: Spray 9 metal pastry cones with non-stick spray. If you don’t have metal cones, craft your own by rolling 8-12 inch sheets of aluminum foil into cone shapes.
- Wrap Pastry Around Cones: Wind each strip of pastry tightly around a cone starting at the pointed end, overlapping slightly to avoid gaps. Press the end gently to secure. Place wrapped cones in the freezer for 20-30 minutes to help hold shape during baking.
- Preheat Oven and Prepare Baking Sheets: Preheat oven to 400°F (205°C). Line two baking sheets with silicone mats or parchment paper.
- Arrange Pastry Cones on Sheets: Place the pastry-wrapped cones seam side down on baking sheets spaced 2-3 inches apart to allow expansion. Arrange 4 on one sheet and 5 on the other, positioning them diagonally.
- Apply Egg Wash and Sugar Dusting: Whisk 1 egg with 1 teaspoon water to make an egg wash. Brush the tops of each pastry cone with the wash to promote browning. Using a flour sifter or fine mesh sieve, dust 1/4 cup of powdered sugar over the pastries.
- Bake Pastries: Bake in the preheated oven for 15 minutes until golden brown and puffed. Remove from the oven and cool on the baking sheets with the metal cones still inside to maintain shape.
- Prepare Cream Filling: In a large bowl, whip the heavy cream until soft peaks form. Add 3/4 cup powdered sugar and 1 teaspoon vanilla extract. Continue whipping until stiff peaks form. Adjust sweetness if desired by adding more powdered sugar.
- Fill Pastries: After pastries are fully cooled, fill a piping bag with the whipped cream. Firmly pipe the cream into the hollow cavities of each pastry horn. Optionally, dust with additional powdered sugar or drizzle with chocolate.
- Serve and Store: Keep the filled cream horns refrigerated until serving. Enjoy these delicate pastries fresh for best texture and flavor.
Notes
- To make DIY pastry cones, use aluminum foil shaped into cones about 8-12 inches long.
- Ensure the puff pastry is properly thawed to prevent cracking when wrapping.
- Keep the pastry horns spaced apart on the baking sheets as they expand during baking.
- Chill wrapped cones in the freezer before baking to help maintain their shape.
- Whipped cream should be stiff peaks to hold shape inside the pastries.
- Store filled cream horns refrigerated and consume within 1-2 days for best freshness.
- You can customize the filling with flavored extracts or drizzle chocolate on top for variation.
- Prep Time: 20 minutes
- Cook Time: 15 minutes
- Category: Dessert
- Method: Baking
- Cuisine: French-American
- Diet: Vegetarian