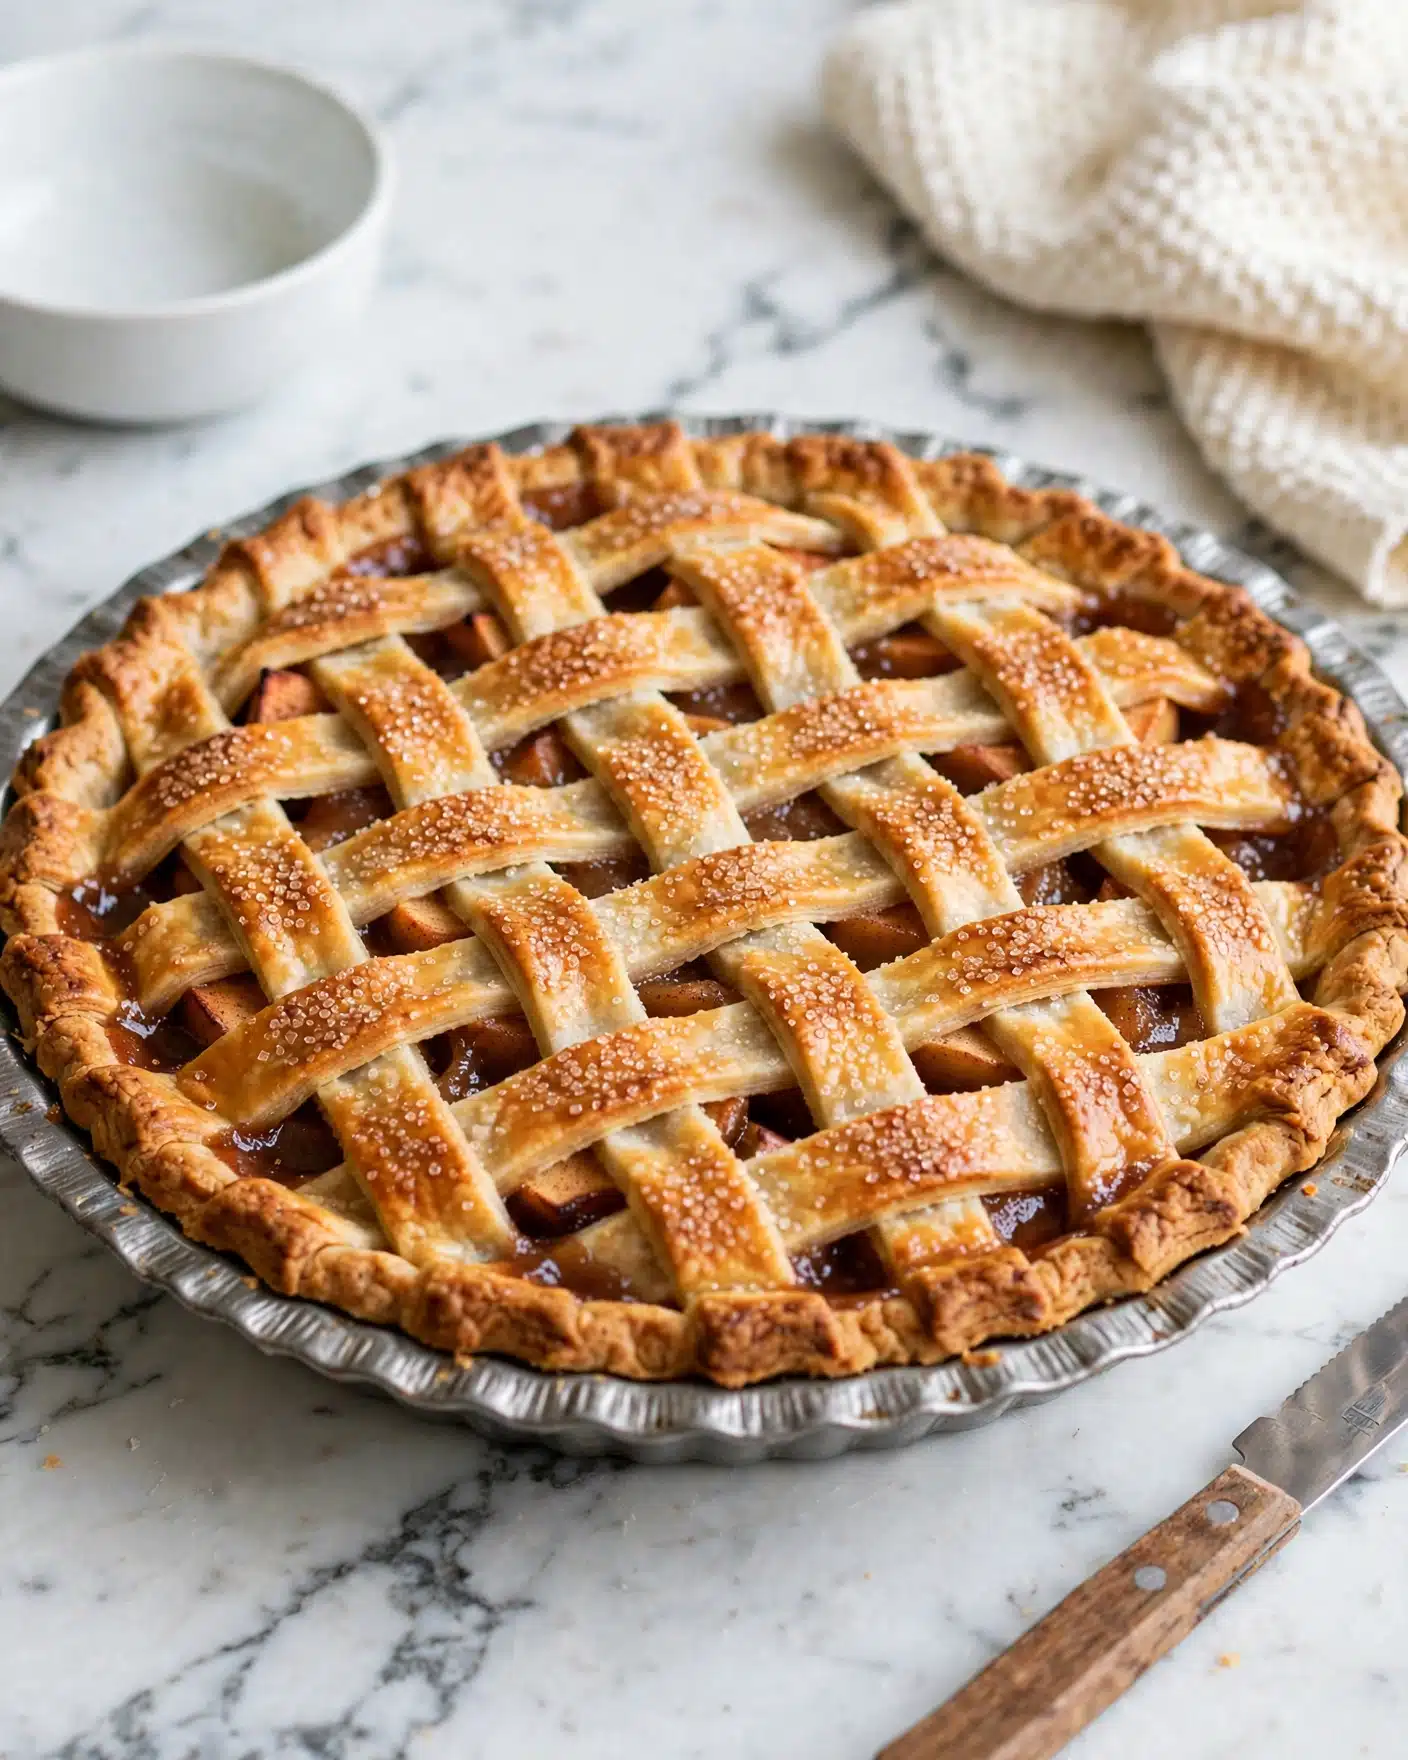
If you’ve ever dreamed of biting into a warm, comforting slice of homemade pie, then you’re going to be absolutely delighted by this Classic Apple Pie with Cooked Filling Recipe. This is not just any apple pie—it’s a perfectly balanced harmony of tender, cinnamon-kissed apples cooked to silky perfection, all nestled inside a beautifully flaky, buttery crust. The magic lies in cooking the filling ahead of time, which intensifies the flavors and keeps the crust from getting soggy. Every bite is a cozy celebration of texture and taste, making it an all-time favorite dessert that’s worth every moment of preparation.
Ingredients You’ll Need

Though this pie might look fancy, the ingredients are beautifully straightforward, each playing a key role in creating that unforgettable flavor and texture. From the tender apples to the vibrant spices and the flaky homemade crust, they all come together to make something truly special.
- Homemade pie crust: Splitting the dough into two portions ensures one for the base and one for the lattice top, giving structure and that buttery crunch.
- Stovetop Apple Pie Filling: Cooking the apples before filling the pie guarantees softness and rich flavor while avoiding any soggy bottom.
- Egg wash (1 egg + 1 Tbsp water): This golden glaze adds shine and helps the sugar stick for that irresistible sparkle.
- Raw or turbinado sugar for sprinkling: Adds a crunchy, caramelized finish that elevates both the look and taste of the pie.
How to Make Classic Apple Pie with Cooked Filling Recipe
Step 1: Prepare Your Pie Crust
Start by making your pie crust at least two hours ahead, or even better, let it rest overnight. This resting period helps the gluten relax, resulting in a tender and flaky pastry. Divide your dough into two parts—one shaped into a disc and the other into a rectangle—which will later become your pie’s base and lattice top.
Step 2: Roll and Chill the Dough
On a lightly floured surface, roll the disc into a circle slightly bigger than your pie dish, about 1/8 inch thick. Carefully line your 9-inch pie pan with the dough, leaving about an inch to hang over the edges for crimping later, then pop it into the fridge while you prepare the lattice strips. Next, roll out the rectangle into a thin sheet and cut strips for the lattice—fluted cutters add a charming decorative touch.
Step 3: Cook and Cool the Apple Filling
One of the beauties of this Classic Apple Pie with Cooked Filling Recipe is that the filling is pre-cooked on the stovetop. This step cooks the apples to tender perfection while infusing them with warm spices. Be sure to cool the filling completely before adding it to your chilled crust to keep your bottom crust crisp and golden.
Step 4: Assemble and Weave the Lattice
Spoon the cooled apple filling into your crust-lined pan, smoothing it evenly with a spoon or offset spatula to remove air pockets. Begin weaving your lattice strips on top, arranging them in an appealing pattern. Chilling the assembled pie in the fridge for 10 minutes helps the dough set and makes handling the crimping easier.
Step 5: Crimp and Chill Before Baking
Trim the excess dough to make an even border all around the pie. Carefully fold the crust over and create a neat crimped edge—this seals your pie and gives it that classic homemade look. Then, let the pie rest in the fridge for at least 30 minutes to firm up before baking. Meanwhile, preheat your oven to 425°F (220°C) and place a baking tray on the lower rack to catch any drips.
Step 6: Bake Until Golden and Bubbling
Brush the lattice with egg wash and generously sprinkle raw sugar on top for that irresistible caramelized crunch. Bake the pie at high heat for 20 minutes to set the crust, then lower it to 375°F (190°C) and continue baking until the crust turns a deep golden brown and the filling bubbles joyfully, usually about 45 to 60 minutes. If the edges brown too fast, cover them with foil to prevent burning.
Step 7: Cool and Enjoy
Once baked, let the pie cool on a wire rack until it reaches room temperature or slightly warm. This hour of resting helps the filling to set properly and makes slicing easier, though the smell alone will have you eager to dig in sooner!
How to Serve Classic Apple Pie with Cooked Filling Recipe
Garnishes
To elevate your serving, a scoop of vanilla bean ice cream or a dollop of freshly whipped cream complements the warm spices perfectly. A light dusting of powdered cinnamon or a drizzle of caramel sauce also adds visual appeal and flavor layers, making every bite a heavenly experience.
Side Dishes
This pie stands strong on its own, but pairing it with a hot cup of coffee or spiced chai can be a match made in heaven. For holiday dinners or cozy nights in, serving alongside roasted nuts or a simple green salad helps balance the richness of the pie.
Creative Ways to Present
Present your pie in a rustic pie dish to showcase its golden lattice or serve individual slices in pretty bowls with extra apple filling on the side for guests to spoon on top. For a whimsical touch, sprinkle edible glitter or cinnamon sugar on the crust edges to impress visually and delight the palate.
Make Ahead and Storage
Storing Leftovers
If you happen to have any leftover pie (which is honestly rare), you can keep it lightly covered at room temperature for up to two days. For a little longer, storing it in an airtight container in the fridge extends its life up to four days, preserving that delightful taste and texture.
Freezing
Classic Apple Pie with Cooked Filling Recipe freezes beautifully. Wrap the cooled pie tightly in plastic wrap and foil, then freeze for up to two months. To enjoy, thaw overnight in the refrigerator before reheating, ensuring the crust stays flaky and the filling juicy.
Reheating
Reheat slices gently in a 350°F (175°C) oven for 10-15 minutes until warmed through. This method keeps the crust crisp while reviving the luscious filling. Avoid the microwave if you want to maintain that perfect flaky texture.
FAQs
Why cook the apple filling before baking?
Cooking the apples ahead softens them and allows the spices to deeply infuse, giving the pie a richer flavor and preventing the crust from becoming soggy during baking.
Can I use store-bought pie crust instead of homemade?
Absolutely! While homemade crust adds incredible flavor and flakiness, quality store-bought crust can save time and still produce a delicious pie.
What type of apples are best for this recipe?
A mix of tart and sweet apples, like Granny Smith paired with Fuji or Honeycrisp, offers the perfect balance of flavor and texture for the filling.
How thick should I roll out the dough?
Slice your dough about 1/8 inch (3mm) thick to ensure it’s sturdy enough to hold the filling but tender and flaky once baked.
Can this pie be made ahead of time?
Yes! You can assemble the pie the night before and keep it in the fridge until ready to bake. This can actually help the flavors meld and the dough to stay crisp.
Final Thoughts
There really is nothing like a slice of warm, homemade pie to bring comfort and joy to any day. The Classic Apple Pie with Cooked Filling Recipe promises not just a dessert but an experience filled with love, warmth, and that unforgettable apple-cinnamon goodness. Give this recipe a try and watch it quickly become a beloved staple in your kitchen, too.
Print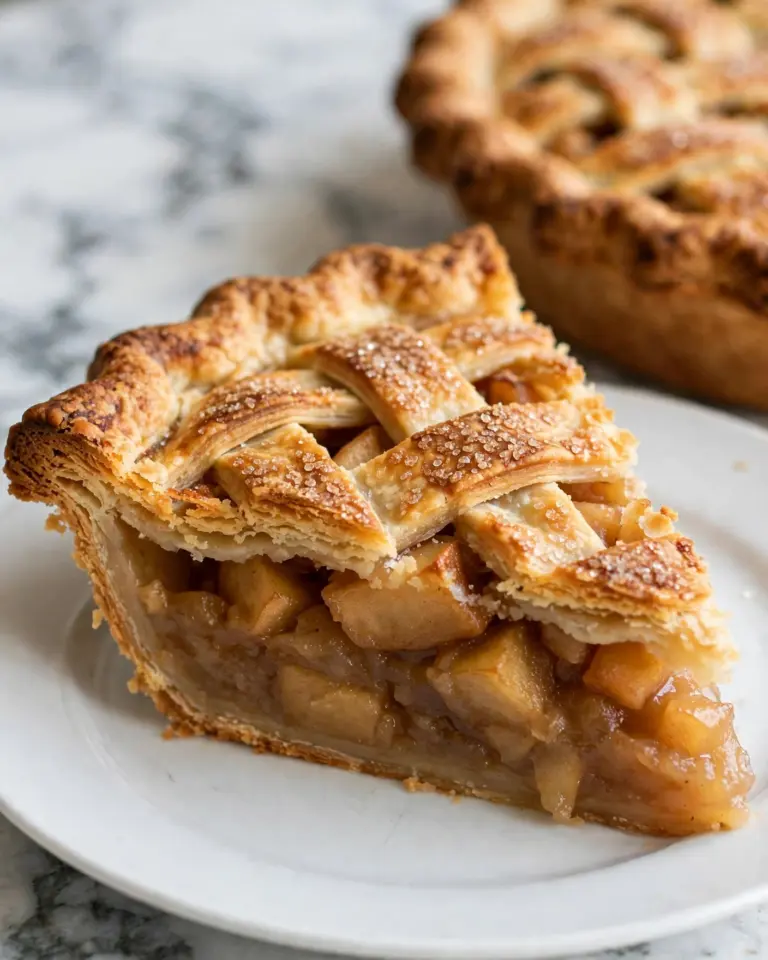
Classic Apple Pie with Cooked Filling Recipe
This Classic Apple Pie features a flaky homemade pie crust filled with a perfectly cooked stovetop apple filling. The pie is topped with a traditional lattice crust and baked to golden perfection, making it an irresistible dessert for any occasion. Detailed step-by-step instructions help you achieve a beautifully crimped pie and a bubbling, sweet apple interior.
- Total Time: 2 hours 5 minutes (excluding dough resting time)
- Yield: 8 servings
Ingredients
Pie Crust
- One batch of homemade pie crust, divided into two halves (one shaped into a disc, the other into a rectangle)
Apple Pie Filling
- One batch of stovetop apple pie filling, cooled to room temperature or refrigerated
Toppings
- 1 egg, whisked with 1 Tbsp water (egg wash)
- Raw or turbinado sugar, for sprinkling
Instructions
- Prepare Pie Crust: Make your pie crust at least 2 hours ahead or overnight to allow it to rest properly for better elasticity and easier handling during rolling.
- Roll Bottom Crust: On a lightly floured surface, roll the disc-shaped dough into a circle slightly larger than your 9-inch pie dish, about 1/8 inch (3mm) thick. Line the pie dish with the dough, leaving about a 1-inch overhang. Trim the edge to leave the overhang intact and place the prepared pan in the fridge while you work on the lattice strips.
- Roll and Cut Lattice Strips: Roll the second piece of dough into a rough rectangle approximately 1/8 inch thick. Use a pastry cutter (preferably fluted) to cut strips for the lattice top. Place the strips on a parchment-lined baking sheet and chill in the fridge until needed. Re-roll scraps as needed to make extra strips.
- Add Filling: Spoon the cooled apple pie filling into the crust-lined pie pan, smoothing out air pockets gently with the back of a spoon or an offset spatula.
- Weave Lattice: Arrange the chilled dough strips over the filling in a lattice pattern of your choice. Return the pie to the fridge for 10 minutes to help the lattice set.
- Trim and Crimp Edges: Trim the bottom crust and lattice strips evenly, leaving enough overhang for crimping. Fold the dough over itself toward the middle of the pie, tucking and pinching gently to form a neat, even edge with your desired crimp style.
- Chill Pie Before Baking: Refrigerate the pie for at least 30 minutes to firm up the crust. Meanwhile, preheat your oven to 425°F (220°C) and place a baking tray in the lower third of the oven for heat control.
- Apply Egg Wash and Sugar: Brush the lattice top with the egg wash, avoiding the edges, and sprinkle generously with raw or turbinado sugar to add sweetness and encourage browning.
- Bake at High Temperature: Bake the pie at 425°F (220°C) for 20 minutes or until the crust is set and starting to turn golden.
- Reduce Heat and Continue Baking: Lower the oven temperature to 375°F (190°C) and continue baking the pie for 45 to 60 minutes until the crust is deeply golden and the filling is visibly bubbling. Shield edges with foil if they brown too quickly.
- Cool the Pie: Remove the pie from the oven and place it on a wire rack to cool until it reaches room temperature or is slightly warm.
- Store Leftovers: Store leftover pie lightly covered at room temperature for up to 2 days, or in an airtight container in the refrigerator for up to 4 days. Reheat before serving, if desired.
Notes
- Resting pie dough overnight enhances flavor and texture.
- Chilling the pie before baking helps maintain the shape of the lattice and crimped edges.
- Use a fluted pastry cutter for decorative lattice strips.
- If the crust edges brown too fast during baking, cover them with foil to prevent burning.
- Ensure the apple filling is fully cooled before adding it to the crust to avoid soggy dough.
- Store leftovers properly for best freshness and flavor.
- Prep Time: 45 minutes
- Cook Time: 1 hour 20 minutes
- Category: Dessert
- Method: Baking
- Cuisine: American