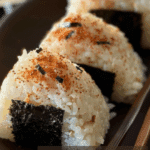
Spicy Tuna Onigiri is a modern twist on the traditional Japanese rice ball, offering a flavorful, creamy, and satisfying filling wrapped in soft sushi rice and crisp nori. Packed with rich tuna, spicy sriracha, and tangy rice vinegar, these onigiri are a simple, portable, and comforting snack or light meal.
Why You’ll Love This Recipe
-
Easy to make: Simple ingredients and straightforward steps make this recipe beginner-friendly.
-
Flavor-packed: The spicy tuna filling brings a bold contrast to the lightly salted rice and umami nori.
-
Customizable: Switch up the fillings with your favorite proteins, spices, or sauces.
-
Perfect for meal prep: Ideal for lunches, snacks, or on-the-go meals throughout the week.
-
Authentic feel: Brings the nostalgic taste of Japan into your kitchen without complex tools or ingredients.
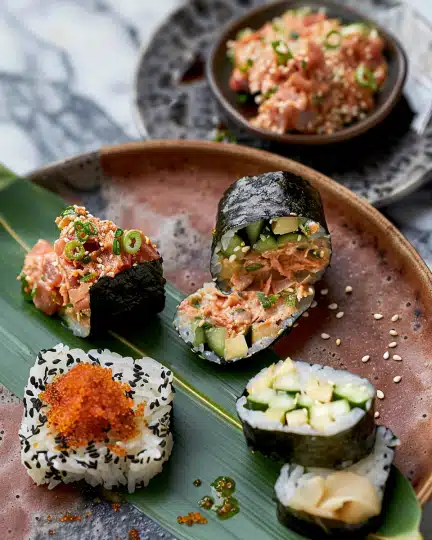
Ingredients
(Tip: You’ll find the full list of ingredients and measurements in the recipe card below.)
-
Japanese short-grain (sushi) rice
-
Cold water
-
Kosher salt
-
Olive oil-packed albacore tuna
-
Mayonnaise
-
Sriracha hot sauce
-
Rice vinegar
-
Scallion (green part only)
-
Toasted black sesame seeds (optional)
-
Toasted nori sheets
Directions
-
Cook the rice
-
Rinse the sushi rice thoroughly in a sieve under cold water, gently rubbing the grains until the water runs clear.
-
Drain well, then cook the rice with water in a rice cooker or stovetop pot (see recipe card for exact times).
-
Once cooked, fluff the rice, cover with a kitchen towel and lid, and let steam for 10 minutes.
-
-
Prepare the tuna filling
-
In a bowl, mix drained tuna, mayonnaise, sriracha, and rice vinegar with a fork until combined.
-
Stir in finely sliced scallion.
-
-
Assemble the onigiri
-
Set up a bowl of room temperature water and a small bowl of kosher salt.
-
Wet your hands with water, rub with a pinch of salt, and grab about ½ cup of warm rice.
-
Form into a thick oval or ball in your hand, create a small indentation, and place 1 tablespoon of tuna filling in the center.
-
Cover with a bit more rice if needed and shape into a triangle using your palms and fingers.
-
Avoid compressing too tightly; the rice should stick together but stay fluffy.
-
-
Finish and serve
-
Sprinkle the outside with black sesame seeds (if using).
-
Wrap a strip of nori around each onigiri and optionally top with a bit more filling.
-
Serve immediately for best texture.
-
Servings and timing
-
Yield: 5 to 6 onigiri (about 4–6 servings)
-
Prep Time: 20 minutes
-
Cook Time: 30 minutes
-
Total Time: 50 minutes
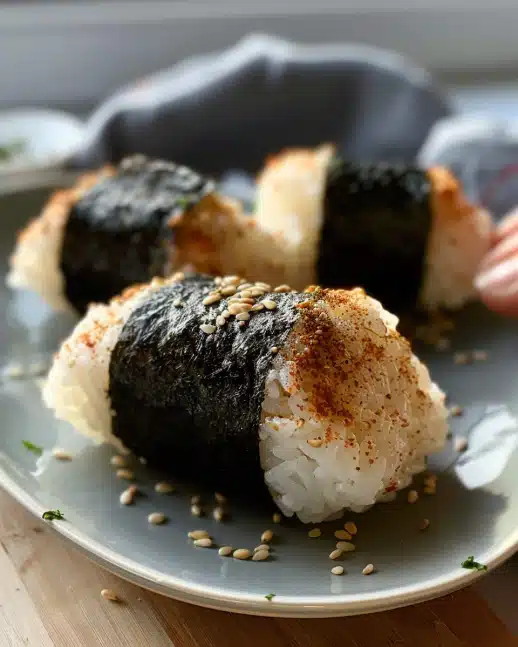
Variations
-
Kewpie mayo: For extra richness and authentic Japanese flavor, substitute traditional mayo with Kewpie.
-
Tuna-free: Use shredded cooked salmon, crab stick, or mashed avocado for alternative fillings.
-
Extra spicy: Increase the sriracha or add a pinch of chili flakes to the filling.
-
Vegetarian: Swap the tuna for a mix of mashed chickpeas, avocado, and soy sauce.
-
Crispy version: Pan-fry shaped onigiri in a bit of oil for a crunchy crust.
Storage/Reheating
-
Storage: Wrap each onigiri tightly in plastic wrap or wax paper and store in an airtight container.
-
Refrigerator: Keep for up to 2 days. For best texture, bring to room temperature before eating.
-
Freezing: Not recommended as the rice and nori texture will degrade upon thawing.
-
Reheating: Onigiri is best enjoyed fresh, but can be gently reheated (without nori) in a microwave with a damp towel over it for 20–30 seconds.
FAQs
What kind of rice should I use for onigiri?
Use Japanese short-grain or sushi rice for the correct sticky texture. Long-grain rice won’t hold together properly.
Can I use a different kind of canned tuna?
Yes. Choose tuna packed in olive oil for the best flavor, but water-packed tuna will also work—just add a bit more mayo.
Do I need a rice mold to make onigiri?
No. Onigiri can be shaped by hand using damp, salted palms. A mold is optional but can make the process easier.
Can I prepare onigiri the night before?
Yes. Prepare and store them wrapped in plastic wrap, but allow them to come to room temperature before eating for best texture.
Is onigiri the same as sushi?
Not quite. Onigiri uses plain salted rice and is typically stuffed and shaped by hand, while sushi rice is seasoned with vinegar and sugar.
How do I keep the rice from sticking to my hands?
Always moisten your hands with water and rub with a little salt before handling the rice.
Can I use regular vinegar instead of rice vinegar?
Rice vinegar is milder and more traditional, but you can use white wine vinegar in a pinch.
What can I use instead of mayonnaise?
Try Kewpie mayo, mashed avocado, or Greek yogurt for different textures and flavors.
Can I use pre-seasoned sushi rice?
For onigiri, plain steamed rice with just a bit of salt is preferred. Sushi rice seasoning is not typically used.
Is onigiri gluten-free?
Yes, if all ingredients (including soy sauce, if added) are certified gluten-free.
Conclusion
Spicy Tuna Onigiri brings the magic of Japanese street food into your kitchen with simple ingredients and authentic flavor. These rice balls are perfect for meal prep, snacking, or introducing your family to Japanese cuisine. With a spicy, creamy filling tucked inside fluffy rice and crisp seaweed, every bite is comforting and satisfying. Try them once and they’ll become a staple in your kitchen.
Print
Spicy Tuna Onigiri
5 Stars 4 Stars 3 Stars 2 Stars 1 Star
No reviews
Spicy Tuna Onigiri is a modern twist on traditional Japanese rice balls, featuring sushi rice filled with a creamy, spicy tuna mixture and wrapped in crisp nori. A flavorful, portable snack or light meal that’s both satisfying and easy to prepare at home.
- Total Time: 50 minutes
- Yield: 5-6 onigiri
Ingredients
1½ cups Japanese short-grain rice (sushi rice)
15 fl oz (440 mL) cold water
Kosher salt
1 (4.5 oz) can Albacore tuna in extra virgin olive oil, drained
1½ tbsp mayonnaise
1 tsp sriracha hot sauce
½ tsp rice vinegar
1 scallion, green parts only, finely sliced
Toasted black sesame seeds (optional)
3 sheets toasted nori, cut in half crosswise
Instructions
- Rinse the sushi rice thoroughly in a sieve under cold water until water runs clear. Drain well.
- Cook rice in a rice cooker with 15 fl oz water or bring to a boil in a saucepan, then reduce to low, cover, and cook 16–18 minutes. Let stand, covered with a towel and lid, for 10 minutes after cooking.
- In a bowl, mix drained tuna, mayonnaise, sriracha, and rice vinegar. Stir in scallions.
- Prepare a bowl of room temp water and a bowl of kosher salt. Moisten hands with water and rub with salt.
- Take about ½ cup of rice and form into a thick oblong shape. Place 1 tbsp of tuna filling in the center and cover with rice, adding more if needed.
- Shape into a triangle using palms and fingers, rotating as needed. Avoid compressing too tightly.
- Sprinkle with sesame seeds (optional), wrap with a piece of nori, and top with extra tuna filling if desired.
- Serve immediately for best texture.
Notes
- Use plain rice vinegar, not seasoned.
- Kewpie mayo adds creaminess if preferred over regular mayo.
- Do not over-compress rice when shaping to maintain soft texture.
- Can prep rice and filling separately and assemble fresh before eating.
- Author: Monica
- Prep Time: 20 minutes
- Cook Time: 30 minutes
- Category: Snack
- Method: Hand-Shaped
- Cuisine: Japanese
- Diet: Low Lactose
Nutrition
- Serving Size: 1 serving
- Calories: 250
- Sugar: 1g
- Sodium: 150mg
- Fat: 4g
- Saturated Fat: 0.5g
- Unsaturated Fat: 3.5g
- Trans Fat: 0g
- Carbohydrates: 41g
- Fiber: 2g
- Protein: 10g
- Cholesterol: 10mg


